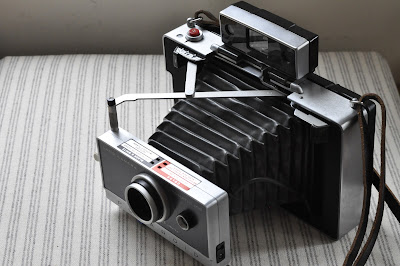
I recently bought a Nikon F with Photomic T finder. The condition of the body is good but the meter was dead. With fresh battery, the meter showed no response to light. (I just used two L1560 alkaline cells, each 1.5V, to substitute the original requirement of two PX625 mercury cells, each 1.35V. The over-applied voltage would result in the light meter showing higher-than-actual values. But my primary goal was to restore the workability of the meter. It was extraneous to talk about precision at this stage.) Besides, the aperture coupling lever was jammed. I tried to fix the problems on my own.
The optical compartment, with prism and eyepiece, can be separated from the upper part of the finder by unscrewing four screws (not identical).
It is remarkable that Nikon achieved through-the-lens (TTL) metering firstly in its Photomic T finder, as this one, in 1965. By disassembling the optical compartment, you can "unearth" this 50-year-old technology that laid the milestone of Nikon's technology advancement. Besides, [analogue] electronic products were high-class at that time, and PCB was cutting-edge technology. Inside this Photomic T finder, there is a small printed circuit board (PCB) placed on top of the optical compartment. (PCB had not been used in its predecessor, Photomic finder). Note that the two electrical connection points (holes) on the PCB are made to contact with the two wires in the upper part of the finder. That PCB can be taken out very easily by unscrewing one more screw.
When I lift up the PCB, a brass washer dropped out (next to the big screw in the photo below) and I failed to recognize where it was originally placed. I just skipped it and everything went fine!
There are only four electronic components on that PCB, namely a fixed resistor (150 ohm), two photo-resistors and a variable resistor. The fixed resistor is in series with the latter three connected in parallel. As the electrical resistance of the photo-resistors decreases with light intensity, the overall electrical resistance of the whole electrical path on the PCB drops.
The two photo-resistors are fitted into two holes (with lens?) underneath through which they receive light.
With screw drivers, big and small, you can thoroughly explore how Nikon achieved TTL 50 years ago. All you need to do is further unscrewing [with due care]...
The key to TTL is two triangular prisms appended to the main pentaprism which diverge light onto the two photo-resistors. Appended to the other side of the pentaprism is a trapezoidal-cylindrical piece of glass that, together with a front-surface mirror placed underneath, serves to enable the needle of the meter be seen (above the image of the object) through the eye piece. Now, all the optical surfaces, except the inner face of the eye piece glass, can be cleaned easily. The inner face of the eye piece glass is still not accessible as that piece of glass is masked by a metal hood "permanently" affixed to the prism holder by two nails (not screws).

Back to the upper part of the finder. The wiring to the battery room seemed not good. With a multimeter, the path from this point to the connector to the PCB was found non-conducting even the switch was "ON". The black wire even fell off completely (two ends of the wire) as I applied a small force on it. The other end of that wire should be connected to the switch. The wire had to be re-soldered.
Before doing that, I decided to check the whole circuit. Parts of the circuit are hidden under the top metal case. To lift off the top case, it is required to peel off the piece of leatherette on top of the finder. I needed to do it very carefully to avoid damage. Four screws were uncovered then.
The top metal case can be lifted off as the four screws are unscrewed. The electrical circuit became clearly traceable once the top metal case was removed.
A circuit diagram has been drawn, as follow:
Before proceeding to the difficult part, I attempted to fix the jammed aperture coupling lever first. Having the name plate removed by unscrewing three screws (one at the top side and two at the bottom side of the name plate) and then two more at each sides of a metal strip, all moving parts can be separated.
The problem was due to dirt in the slot fitting the up-and-down moving part and stiffness of the spring. The slot was cleaned and the spring stretched to restore, to a certain extent, to workable condition. I have reservation on using WD40 as it would be sticky to dust.
Now, back to the electrical part. Re-soldering the wire connecting the battery room and the switch was a bit difficult because the contact to the switch could only be reached after the ring resistor had been loosen to let out some space. To move out the ring resistor, the meter head also needs to be loosen. Before loosing the ring resistor, be reminded to use a marker pen to mark the relative position of ring resistor and the gear wheels of the shutter coupling knob such that they can be resumed to the same relative position. I found the black wire connecting the battery room (negative pole) and the switch seriously oxidized. So, I decided to replace it.
All I could found at home useful for this purpose was a dummy telephone cord which composes of four thin wires. I cut out a short segment of a wire (yellow color) for use as replacement for the black wire and re-soldered the contact to the battery room and the switch.

I used a multimeter to check the path from the negative pole of the battery to the connection point to the PCB with black wire and found it all right. I also checked the electrical resistance across the connection point to the PCB with a red wire and the earth (the contact point of another red wire to the case). In the process, the meter needle flickered. (To measure electrical resistance across two points, the multimeter sends through a small current and measures the voltage drops. Part of this current just branched through the meter head (the remains branched through the ring resistor), causing its needle to deflect). It means that the meter head was not dead. I turned the ring resistor and found the resistance varied also. Things seemed to be in order.
I took the opportunity to clean the inner side of the ring resistor using cotton buds soaked with alcohol as I learnt people on the Internet saying that bad contact would result in the meter being jumpy. It was so unfortunate that a strip of metal came off during the cleansing process. I later noted that half of the inner side of the the ring resistor was coated with carbon and the other half was covered by that metal strip. Due to different electrical resistance of carbon and the metal, the overall resistance of the ring resistor varies as the two moving contacts (one associated with aperture/ASA and the other with shutter speed) take different positions on the carbon coating and the metal surface. Eventually, I re-attached the metal strip back to more or less the original position on the inner side of the ring resistor with glue.

There is a variable resistor on top of the finder (under the top metal case). It should be used to calibrate the meter. I tried to have the all necessary parts reassembled to test the meter's response to light. The finder has to be equipped onto he camera body with a lens as it is how TTL metering works. It is necessary to "input" the maximum aperture of the lens to the finder through the ASA selection dial. What I have tried was to make measurements with a "light meter" app in iPhone and set the aperture/ASA/shutter combinations to the finder, then adjusted the variable resistor to make the meter needle to point to "O". It was so frustrating that although I successfully adjusted the variable resistor to make the needle pointing to "O" at a combination, the needle was off from "O" again when I changed to another combination under the same illumination. I guess it was the conducting surfaces (carbon/metal) of the ring resistor having uneven electrical resistance, probably due to ageing (erosion or oxidation). The precision of this meter could hardly be restored unless the ring resistor is replaced, I think.

Before putting the metal top case back, segments of cellulose tape (insulating) was affixed to avoid short-circuit.
For the sake of convenience of further repairing in the future, I decided not to have the leatherette re-glued.